My article includes 5 part:
Part 1. How to rip DVD to video format on Mac
Part 2. How to convert video on Mac
Part 3. How to transfer info between iPod and Mac
Part 4. How to make iPhone ringtone on Mac
Part 5. How to copy DVD on Mac
Before we get start, I want to introduce you a really powerful tool:
Aiseesoft DVD Software Toolkit for Mac. It can do what I said above easily.

Part 1. How to rip DVD on Mac
Just click DVD Ripper for Mac on the main interface.
Step 1. Load you DVD.
Click the “Load DVD” button(a), find the DVD folder of the movie you want to add from your DVD-ROM, and Click “Open”.

Tick the check boxes(b) before the titles and chapters that you want to rip.
Step 2. Chose output profile and settings.
Selecting output format is really easy, you can chose your output format according to your devices players and the default setting works great.
Tips: Sample rate (Hz) = any value up to 48000 (higher value = better sound quality = bigger file)
Bitrate (kbps) = any value up to 160 (higher value = better sound quality = bigger file)
After setting your own output and settings you can click “Start” button to start your conversion. (The time of the conversion depends on your DVD and the settings you chose.)
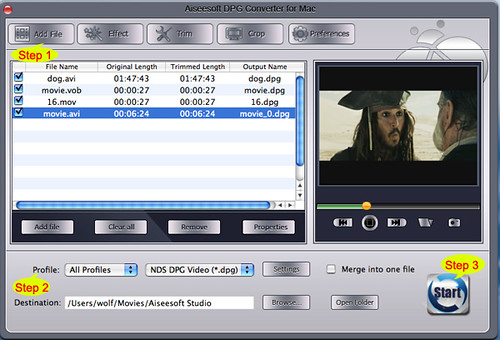
Part 2. How to convert video on Mac
Click Video Converter for Mac on the interface.
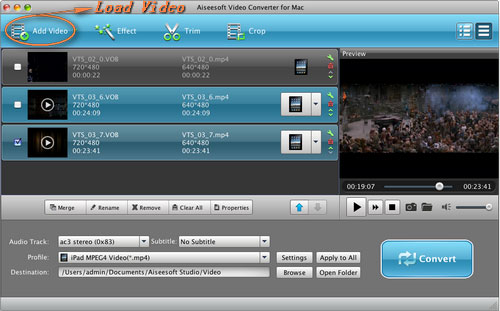
Step 1. Load video
Easily click “Add File” to load your video that you want to convert.
Step 2. Choose output profile and settings
At the bottom of the interface there are a drop-download list named “profile”. You can choose your output format here.
You can also adjust the settings of your output video, such as Resolution, Bit rate and so on.
After you finish the 2 steps, you can just click “Start” button to start your conversion.
Part 3. How to transfer info iPod and Mac
Use iPod Manager for Mac
Step 1. Plug your iPod to your Mac
Aiseesoft iPod Manager for Mac can find it automatically.
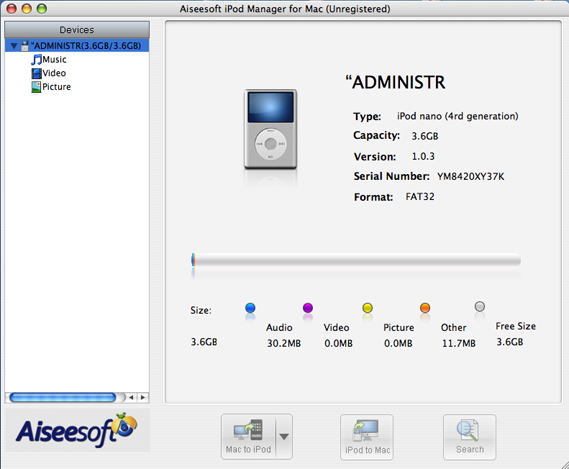
Step 2.
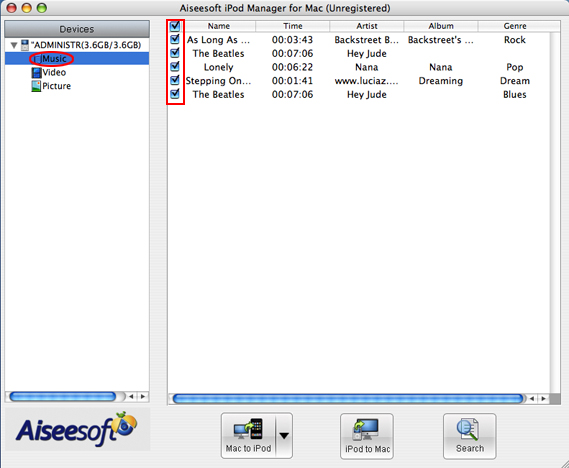
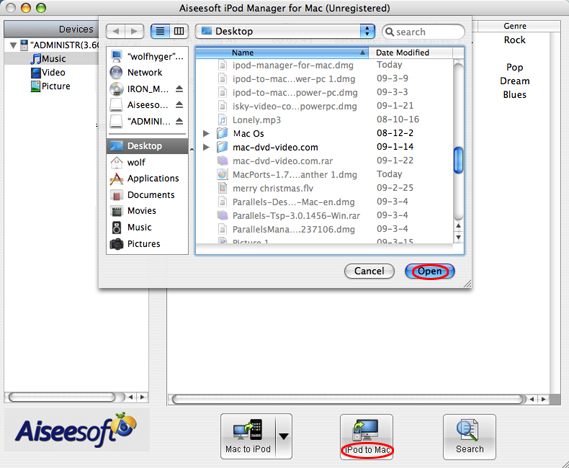
a. if you want to transfer music and videos from iPod to Mac
Pick up what you want to backup
Just click Music and all of your music on your iPod will be listed, so you can pick up which songs you want to transfer. (Click “Video”/“Picture”, if you want to backup your videos and image.)
Click “iPod to Mac” and find where to put your iPod info on your Mac and click “Open”
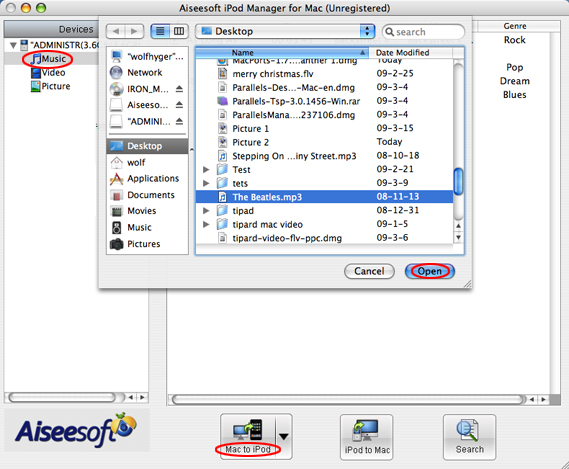
b. if you want to put music and videos from Mac to iPod.
1. Click “Music”
2. Click “Mac to iPod” and pick up the songs on your Mac you want to put on your iPod and click “Open”
(If you want to put video/image, just click “Video”/“Picture” and other operation is the same as putting songs)
Part 4. How to make iPhone ringtone on Mac
Click iPhone Ringtone Maker for Mac on the main interface.
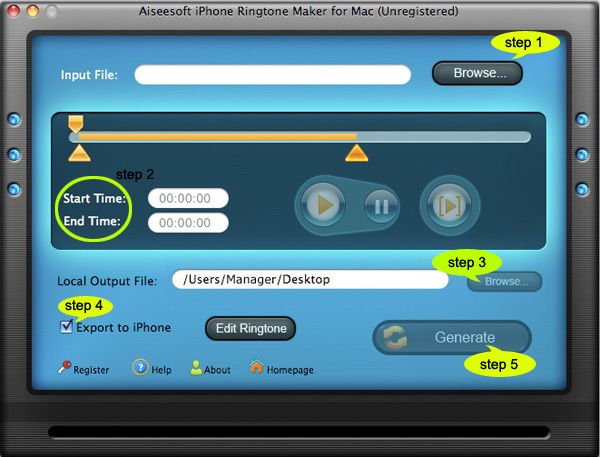
Step 1: Click “Browse” on the right side of "Input File" to import the file that you want to make ringtone from it.
Step 2: Play it and listen the music to find the segment that you want to use it as ringtone. Then drag and click the start & end slider to set your wanted segment, or type the start & end time in the corresponding text box directly to get the exact segment. You also can pre-listen the converted audio before generate.
Step 3: Click “Browse” on the right side of "Local Output Folder" to choose the output destination.
Step 4: Check "Export to iPhone" option, the converted ringtone will be load to your iPhone directly.
[b]Step 5[/b]: After all the settings are finished, click “Generate” to begin making your own iPhone ringtone.
Key function
● Convert any video to iPhone ringtone M4R
● Create iPhone ringtone from any audio files
● Get any clips from video and audio
● Edit Added iPhone ringtones
Part 5. How to copy DVD on Mac
You need to use DVD Copy for Mac.
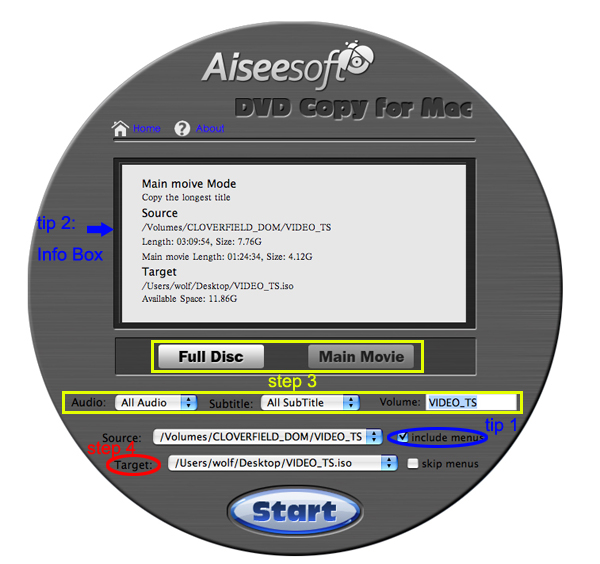
Step 1. Load Your Source
This excellent DVD copy for Mac allows you to load DVD folder and DVD image ISO.
Step 2. Choose Output Info
1. “Full Disc” or “Main Movie”
This DVD copy for Mac enables you to copy the full disc and also the main movie according to your need.
2. “Audio”, “Subtitle” and “Volume” name
You can choose your output audio from the “Audio” drop-down list, such as “all audio”/ “None”/ or some audio the DVD provide.
Subtitle is always an important thing, you can choose your output subtitle in “Subtitle” drop-down list.
You can also name your output volume's name
Step 3. Choose Your Target
You can copy your DVD to another DVD disc, DVD folder or DVD image ISO.
Tips:
1. You can also choose to copy the menus or not.
2. All the info you choose will be dispalyed on the “Info Box”.


 Start to compress DVD:Click “Start Copy” button to begin your DVD compressing.
 The images on blu-ray disc are sharper, brighter, and more detailed than any DVD movie. What manufacturers are trying to do is make the movie look as close to what you see in a real theater as possible, except for its a tenth the size and in your home.

 buttonto open the Video Edit interface.
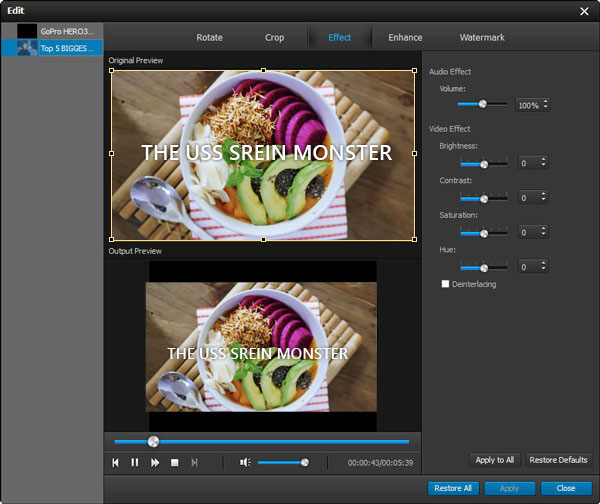 You can adjust the video brightness, contrast and saturation by dragging the slider bar. Even you can convert an interlaced video to a progress one by checking the "Deinterlacing" box.
 button to open the trim window.
 And we provide you with three ways to trim your video to your preference.
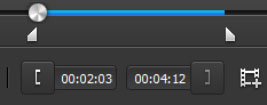
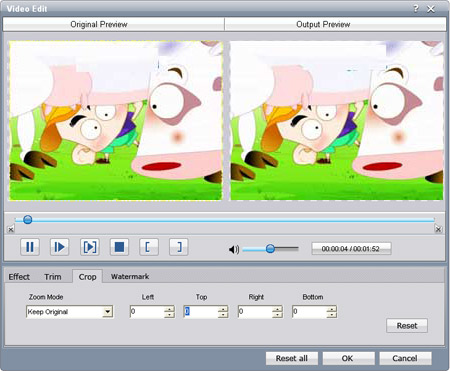
 button and go to the "Video Edit" interface.
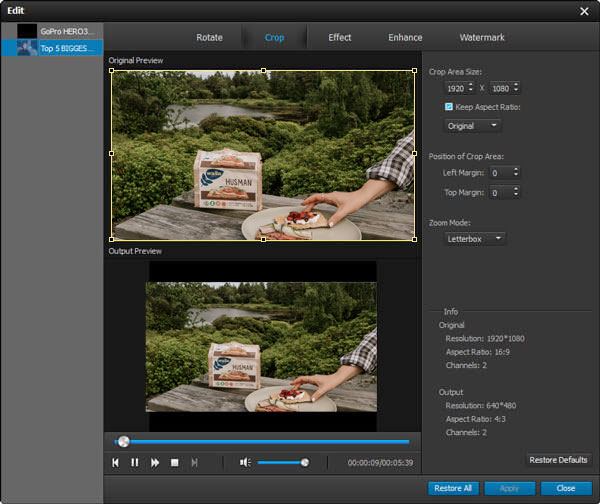 With this function, you can easily remove the useless black edges around your movie video and customize the aspect ratio to fit your player.
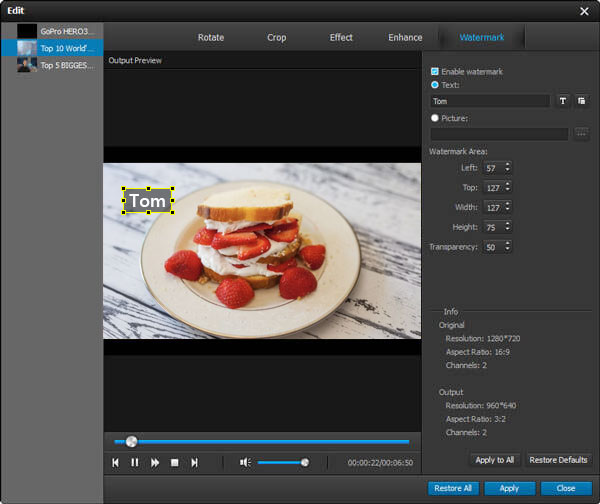 And you are allowed to adjust the watermark's position by setting the horizontal and vertical values or just dragging the watermark on the frame. Also you can adjust the transparent value to get the satisfactory effect.
 Click the Snapshot button to capture the picture. And you can save the picture in the JPEG, GIF, and BMP format. The Snapshot Folder button can open the file where the capture picture is saved.